If you’ve ever dabbled in DIY woodworking—whether building a floating shelf for your living room, a set of drawers for your garage, or even a kid’s toy box—you know that one of the most frustrating tiny mistakes can ruin an otherwise great project. Cut a sheet of plywood, MDF, or particleboard just right, sand the edges smooth, stain or paint the front face to match your vision, and then you’re left with those raw, porous, fuzzy edges staring back at you. They don’t look neat, they catch dust, and they’re just begging to get chipped or peeled after a few months. That’s where edge banding comes in. And if you’re like most DIYers (or even small woodshop operators) who don’t have a fancy edge banding machine, using a regular iron is the perfect, low-cost fix. Edge Banding
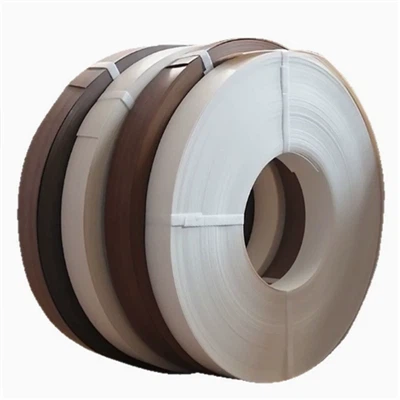
For me, I’ve been an edge banding supplier for 12 years now, and I still get emails every week from people who tried to wing it with an iron and ended up with loose edges, burned marks, or glue that oozed all over the place. The thing about edge banding isn’t just slapping a strip on and ironing—it’s knowing how to prep, choose the right banding, and nail each small step so it sticks tight and looks like it was done by a pro. I’ve spent years testing this method on every type of material and every kind of edge banding we sell, so I’m gonna walk you through this step-by-step, no fancy tools required, and skip all the jargon that makes this sound harder than it is.
First, let’s get one thing straight: not all edge banding works with an iron. The most common type we supply for iron application is hot-melt glue edge banding, also called pre-glued edge banding. That’s the stuff with a thin layer of heat-activated glue on the back—you don’t need to mix glue or buy separate adhesive. Other types, like peel-and-stick or double-sided tape banding, are easier but don’t give as strong a bond for high-use pieces, so I’m sticking to the hot-melt kind here, since it’s the best for a long-lasting finish. We sell this in every finish you can imagine—wood grain (oak, maple, cherry, pine, even exotic stuff like walnut or teak), solid colors, white for painted projects, and even laminate for a sleek, modern look. Just make sure you match the banding thickness to your material: for standard plywood and MDF, 0.4mm or 1mm thick is the sweet spot; for thicker particleboard, go for 2mm so it doesn’t warp or pull away.
Now, let’s talk about the tools you actually need. You don’t need a big workshop setup here. Grab a regular household iron (no, not the steam one? Wait, actually, a basic steam iron works fine, but turn the steam off—too much moisture ruins the glue. I learned that the hard way when I tried to use steam on a birch shelf and the edge banding bubbled up within a week. Oops). Then you need a sharp utility knife—get extra blades, because a dull one will tear the banding. A straightedge (a metal ruler, a square, even a long piece of straight wood works) is non-negotiable, unless you have the hands of a surgeon, because cutting perfect strips freehand is impossible for most of us. Some people use a sanding block, a hammer (a small rubber one is better than a metal one, so you don’t dent your wood), and a damp cloth to wipe off excess glue, but you can make do with just the basics if you’re on a tight budget.
Wait, the biggest prep step before you even touch the iron: getting your edge clean and dry. This is way more important than people think. If there’s sawdust on the edge, or even a little bit of oil from when you cut the wood, the glue won’t stick. I tell all my customers this: if you skip prep, you’ll end up with a loose edge, guaranteed. First, sand the raw edge lightly with 120-grit sandpaper—just enough to smooth out any fuzzy fibers, don’t sand so much that you round the edge (that makes the banding hard to line up). Then wipe it down with a dry rag to get rid of all the sanding dust. If your wood is super dusty from a big cut, even a quick pass with a tack cloth works better than a regular rag—tack cloths pick up fine dust that rags miss. Once that’s done, measure the length of the edge you’re covering. Add about 1/4 inch to each end—you’ll trim that off later, so don’t worry about cutting it exactly right now. That extra 1/4 inch is your “overhang” buffer, so you don’t accidentally leave a gap at the corner.
Next step: applying the banding. This is where people mess up most of the time. Lay your edge banding strip on top of the raw edge, making sure it’s centered. Wait, centering is key! If it’s off by even a little, you’ll have too much on one side and too little on the other, which will look sloppy. For straight edges, this is easy—align the middle of the banding with the middle of the wood edge. For corners? Don’t get fancy with miter cuts yet—we’re doing straight edges first, corners can be done after. Once it’s aligned, hold it in place for a second to make sure it doesn’t slide. Now, the iron: turn it to the cotton setting (that’s around 300°F, perfect for activating the hot-melt glue on our banding), no steam, and no water in the reservoir. Wait, let the iron heat up fully—don’t press it right away when it beeps, let it sit 2 more minutes.
Now, ironing: start at one end, not the middle. Press the iron firmly (not so hard that you dent the wood, but hard enough that the glue touches the edge) and move it slowly along the banding. Don’t rub it back and forth like you’re ironing a shirt—you’ll shift the banding and cause bubbles. Just slide it in a straight line, keeping the iron flat the whole time. I usually go over each inch two or three times, especially on the middle part where the banding is most likely to pull away. As you iron, you’ll see a little bit of glue seep out from the edges of the banding—that’s good, it means the glue is activating. If too much seeps out, you’re using too much pressure, or the iron is too hot. Turn the heat down a little next time, but don’t worry about it right now.
Once you’ve ironed the whole length, let it cool for at least 10 minutes. I know, it’s hard to be patient, but if you try to trim it right away, the banding will shift and you’ll cut it wrong. After it’s totally cool, grab your straightedge and utility knife. Clamp the straightedge along the edge of the wood—for the end overhang, hold the straightedge at a 45-degree angle so you cut the overhang flush. Run the utility knife along the straightedge, and do this on both ends. Make a few light passes, don’t press hard in one go, because that can leave a deep mark in the wood. If the banding starts to pull while you’re cutting, it’s not cool enough—wait another 5 minutes.
Now, the excess glue that seeped out: you can wipe it off with a damp cloth while it’s still a little warm, or wait until it’s cool and sand it off with fine-grit (220-grit) sandpaper. Be careful when sanding—don’t sand too hard, you’ll take off the edge of the banding and make it look uneven. For the edges, a light pass is all you need.
What about corners? That’s the next most common question people ask me. For square corners, like a drawer front where two edges meet at a 90-degree angle, you can wrap the banding around the corner. Let’s say you’re doing the front of a drawer: first apply the edge banding to the two side edges, iron them, cool them, trim them. Then cut a piece of banding for the front edge, add 1/4 inch to each end. When you iron the front edge, when you get to each corner, press the iron a little harder and hold it for 10 seconds, then keep moving. The glue will melt enough that the banding will bend around the corner without cracking. Then trim the ends so they meet in the middle at the back of the drawer, and sand the little joint smooth. For round corners, it’s even easier: just cut the banding a little longer than the curved edge, iron it on, then trim with a utility knife or use a small sanding block to shape it.
Now, the mistakes everyone makes, and how to fix them. Let’s talk about bubbles: if you get a small air bubble in the middle of the banding, you can take a pin and poke a tiny hole in the bubble, then press the iron over it again to flatten it. If the bubble is big, you’ll have to pull the banding off (carefully, so you don’t damage the wood) and reapply it. Burn marks: if you accidentally melt the banding, that’s usually from too hot an iron. Turn the heat down, and if the mark is small, you can sand it lightly, or if it’s on a wood-grain banding, take a matching wood stain pen and touch it up. Loose edges: if the banding comes off a small section, you can reactivate the glue by running the iron over it again, pressing firmly, and holding for a few seconds. If a big section came off, you’ll have to sand off the old glue and reapply the banding.
A quick tip from the pros: practice on a scrap piece of wood first. We always send small edge banding samples with every order, so use one of those to test your iron temperature, pressure, and speed before you do your actual project. That way you don’t mess up your expensive plywood or MDF. Also, store your edge banding in a cool, dry place—if it gets too hot, the glue will activate prematurely, and it won’t stick right.

If you’re looking for edge banding supplies, we carry all the types I mentioned: hot-melt pre-glued, peel-and-stick, solid-color, wood-grain, every thickness and finish you need. If you have questions about matching banding to your material, or how to pick the right finish for your project, our team is here to help—just reach out to us to talk through your needs. We’ve been supplying edge banding to DIYers, small woodshops, and big furniture manufacturers for years, so we know exactly what works for every project, big or small. Just send us a message, and we’ll help you get the right supplies to make your edge banding job look perfect.
Hot Melt Glue References
- Woodworking Network. (2022). “Edge Banding Basics for DIYers.” DIY Woodworking Guide.
- Edge Banding Pro. (2021). “Hot-Melt Edge Banding: Application Tips and Troubleshooting.”
- Fine Woodworking. (2020). “Low-Cost Edge Banding Methods for Small Wood Projects.”
- The Family Handyman. (2023). “How to Apply Edge Banding with a Regular Iron.”
Yitai Yijia New Material Technology Co., Ltd.
As one of the leading edge banding manufacturers and suppliers in China, we also support customized service. Welcome to wholesale bulk high quality edge banding in stock here from our factory. If you have any enquiry about quotation, please feel free to email us.
Address: No.55 Qiangyuan Road, Shuanglin Industrial Park, Shuanglin Town, Nanxun District, Huzhou City, Zhejiang Province, China
E-mail: 932788096@qq.com
WebSite: https://www.yitaiyijia.com/
